
Rotisserie Chicken Recipe (Juicy, Evenly Roasted, and Built for Real Meals)
Rotisserie chicken looks simple from the outside, but getting it right at home is all about control. When done properly, the meat stays juicy, the skin turns deeply golden, and the flavor is seasoned all the way through—not just on the surface. This is not just a roast chicken that spins. It’s a method that delivers even cooking and reliable results when you understand the basics.
This recipe is written for home cooks, not commercial machines. You don’t need a restaurant setup or complicated tricks. What you do need is correct seasoning, balanced heat, and patience. Once you learn the flow, rotisserie chicken becomes one of the most useful proteins you can make for dinners, meal prep, and leftovers.
Why This Recipe Works / Why People Love It
This recipe works because it respects how a whole chicken cooks. Rotating the bird allows fat to baste the meat continuously, which keeps the breast from drying out while the legs cook through. Seasoning is applied thoughtfully so flavor penetrates, not just coats.
People love rotisserie chicken because it solves multiple problems at once. One chicken can become several meals—dinner the first night, salads and soups later, and stock from the bones. It’s efficient, comforting, and far more flavorful than store-bought when made correctly.
Flavor and Texture You Can Expect
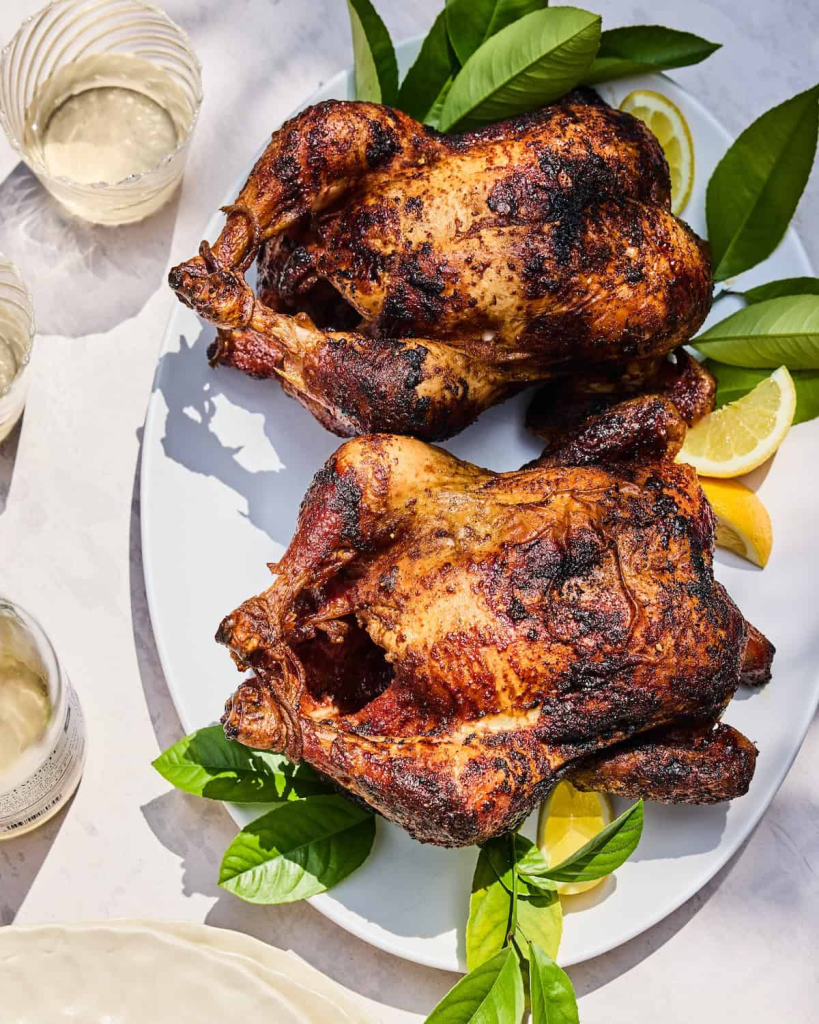
The flavor is savory, balanced, and deeply roasted. Salt and simple spices highlight the chicken rather than masking it. You taste the meat, the skin, and the seasoning working together.
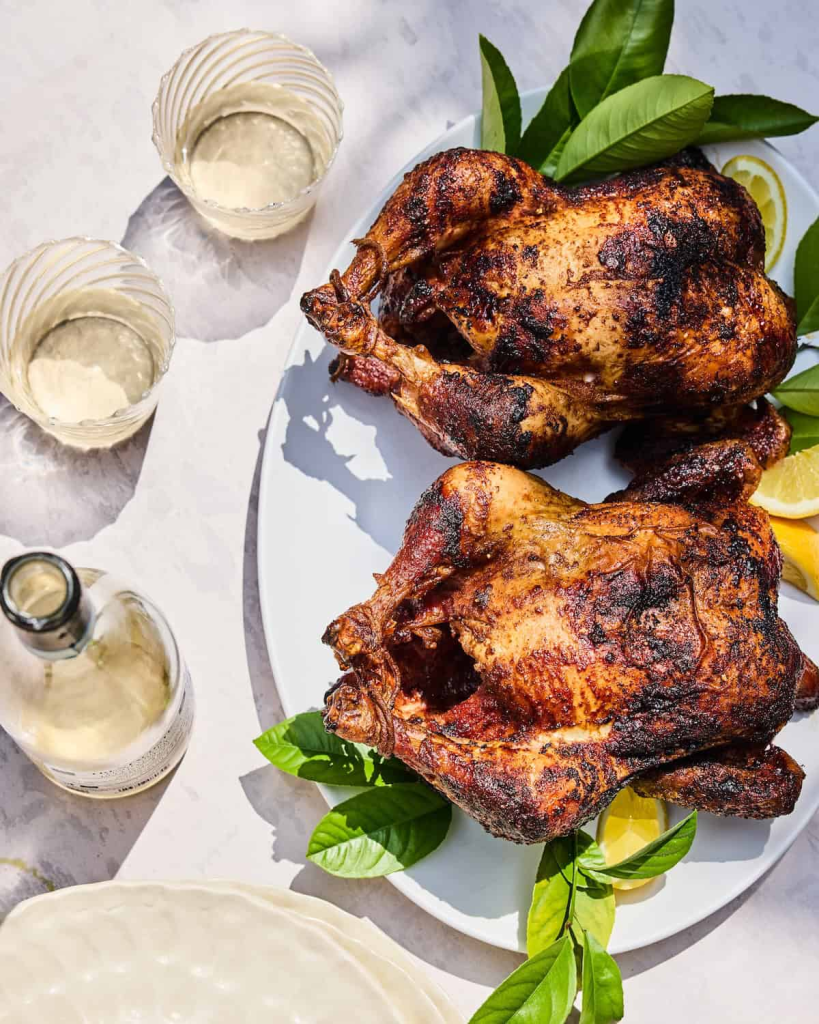
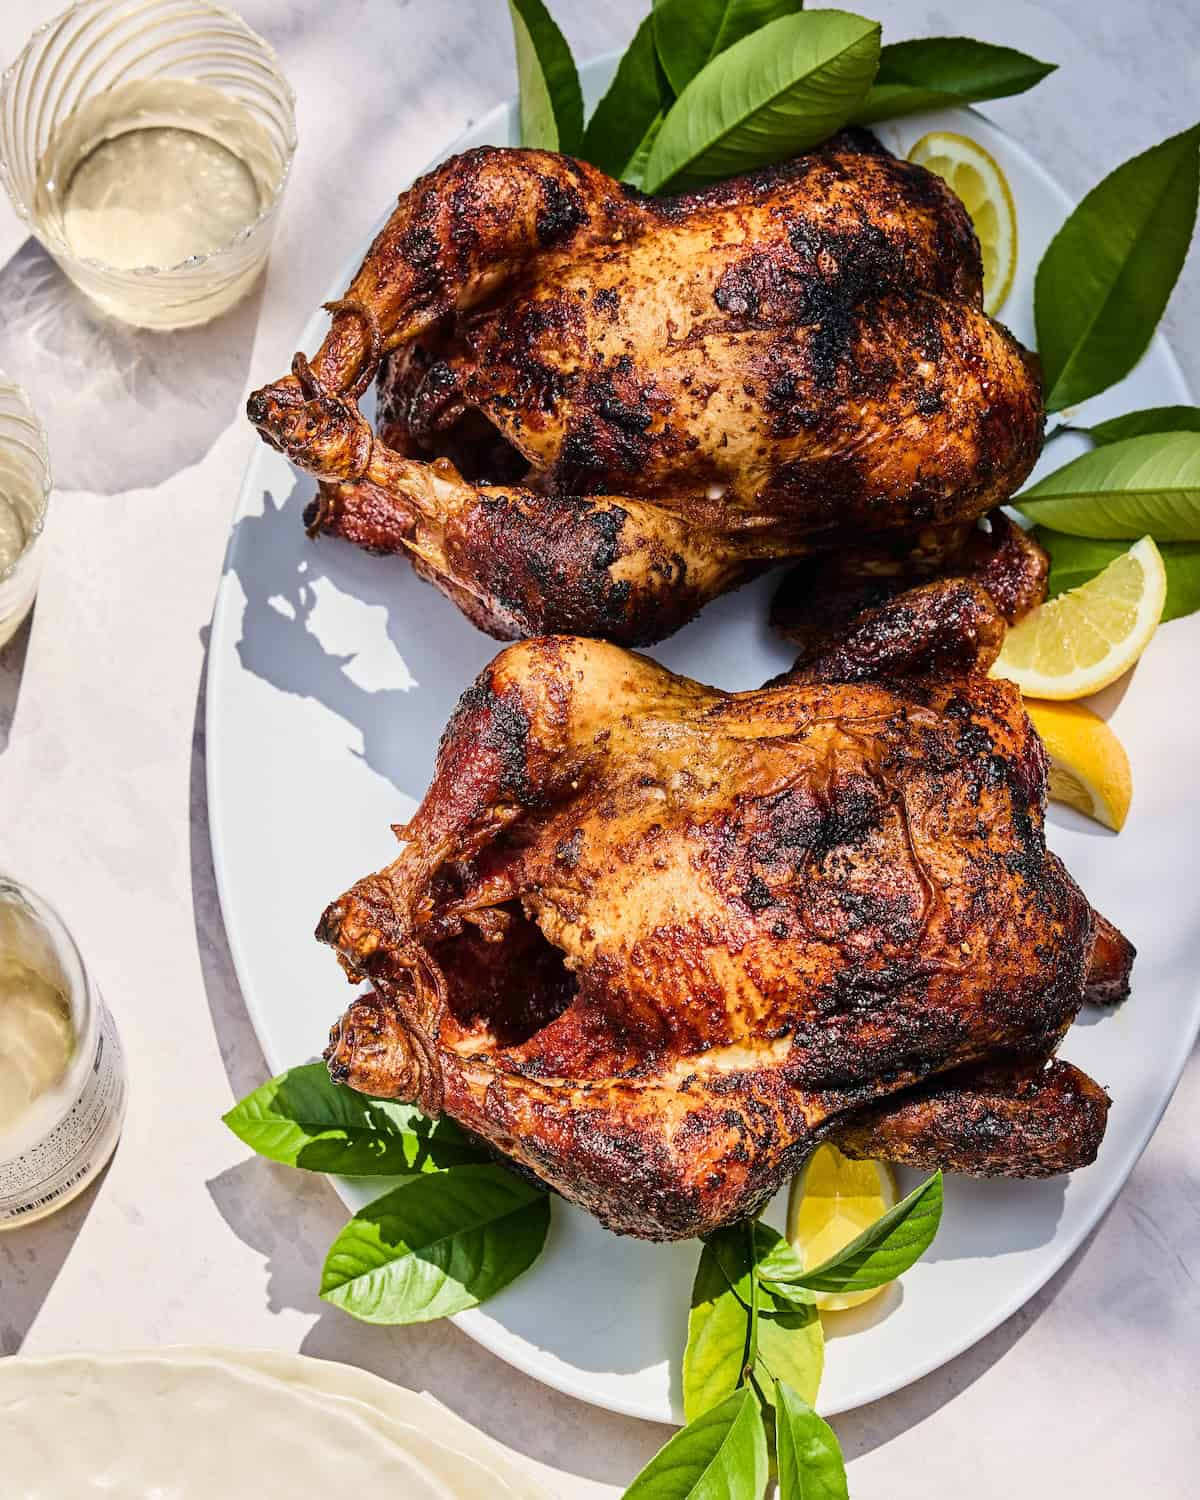
Texture is where this shines. The skin becomes crisp and golden, while the meat stays moist and tender. The breast slices cleanly without crumbling, and the dark meat pulls easily from the bone.
Ingredients
Rotisserie chicken does not need a long ingredient list. In fact, fewer ingredients usually produce better results. What matters is coverage, balance, and timing.
The chicken itself is the star, so quality matters. Oil or butter helps the skin brown and crisp. Salt is non-negotiable—it seasons the meat all the way through. Spices add depth but should never overpower the natural flavor of the chicken.
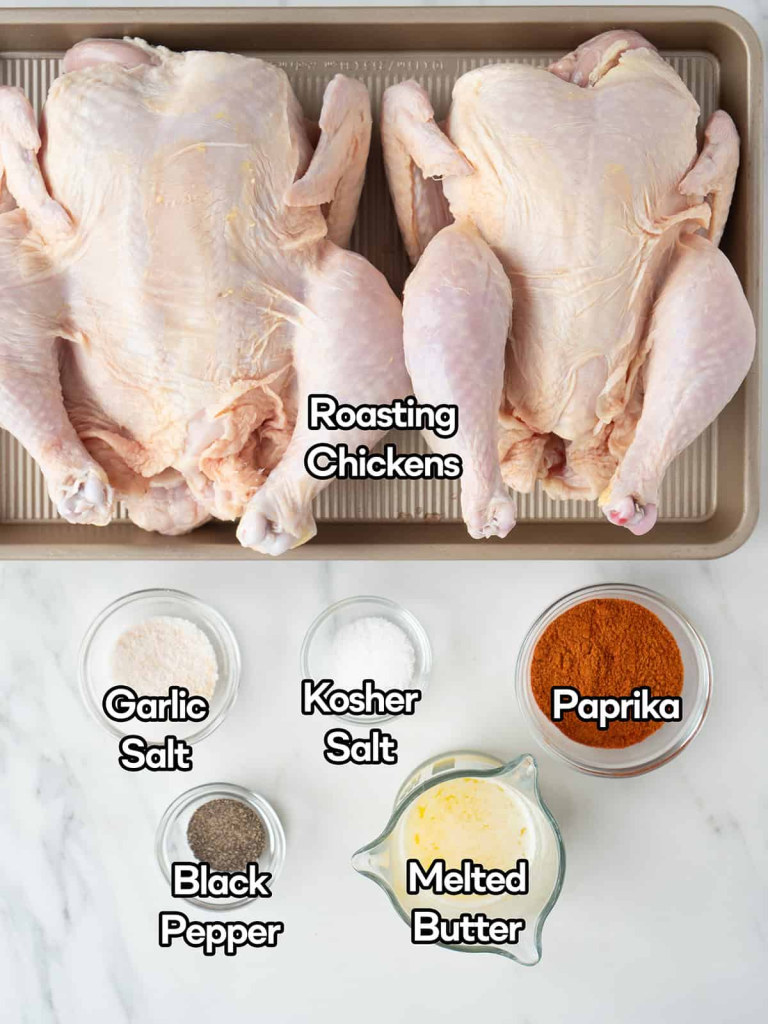
- Whole chicken (3½–4½ pounds), giblets removed
- Olive oil or melted butter
- Salt
- Black pepper
- Paprika
- Garlic powder
- Onion powder
- Optional: dried thyme, rosemary, or lemon zest
How to Make Rotisserie Chicken
Step 1. Prepare the Chicken
Remove the chicken from the refrigerator 30 minutes before cooking. Pat it completely dry with paper towels, including inside the cavity. Dry skin is essential for crisp results.
Step 2. Season Thoroughly
Rub the chicken all over with olive oil or melted butter. Season generously with salt, black pepper, paprika, garlic powder, and onion powder. Make sure to season the cavity as well.
Step 3. Truss the Chicken
Tie the legs together with kitchen twine and tuck the wing tips behind the body. This keeps the chicken balanced on the rotisserie and ensures even cooking.
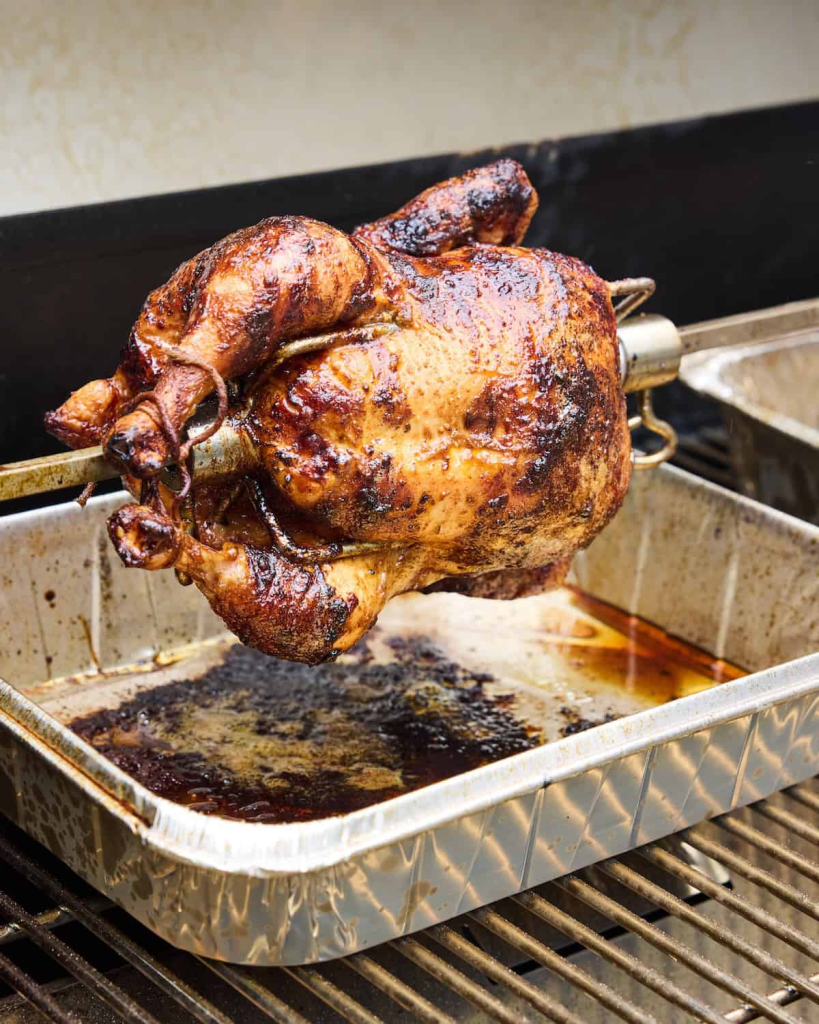
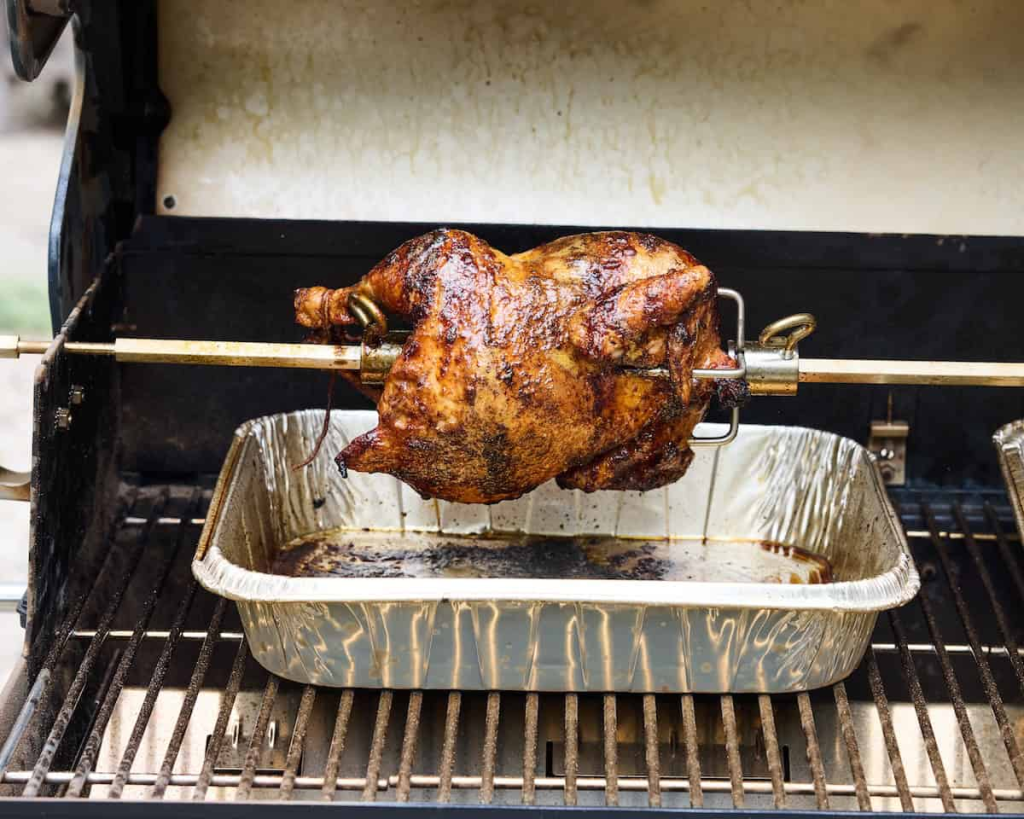
Step 4. Secure on the Rotisserie Spit
Insert the rotisserie rod through the center of the chicken, securing it tightly so it does not wobble. Balance matters—an uneven chicken cooks poorly.
Step 5. Preheat and Cook
Preheat your grill or oven rotisserie to medium heat (around 375°F / 190°C). Place the chicken on the rotisserie and cook for about 60–90 minutes, depending on size, until the internal temperature reaches 165°F in the breast and 175°F in the thigh.
Step 6. Rest Before Carving
Remove the chicken carefully and let it rest for 10–15 minutes. This allows juices to redistribute and keeps the meat moist.
Step 7. Carve and Serve
Carve into breasts, thighs, drumsticks, and wings. Serve immediately or cool for storage.
Seasoning Variations That Work
Once you master the base version, variations are easy. Add smoked paprika for deeper flavor, lemon zest for brightness, or dried herbs for a classic roast profile. Avoid wet marinades—they prevent proper browning.
Dry rubs work best for rotisserie cooking.
What to Serve With Rotisserie Chicken
Rotisserie chicken pairs with almost anything. Roasted vegetables, potatoes, rice, or a simple salad all work well. For lighter meals, use the chicken in wraps, bowls, or salads.
This is also one of the best proteins to build multiple meals from throughout the week.
Make-Ahead and Storage Tips
Let the chicken cool completely before storing. Keep it in an airtight container in the refrigerator for up to four days. For longer storage, remove meat from the bones and freeze.
Save the carcass—it makes excellent homemade stock.
Common Mistakes to Avoid
Skipping the drying step leads to rubbery skin. Under-seasoning results in bland meat. Not trussing the chicken causes uneven cooking. Finally, carving too soon releases juices and dries out the meat.
Rotisserie chicken rewards patience and preparation.
FAQs
Do I need a rotisserie attachment?
Yes, for true rotisserie cooking. Otherwise, this becomes a roast chicken.
Is rotisserie chicken healthier than fried chicken?
Yes. It uses minimal fat and allows excess fat to drip away.
Can I use this recipe in the oven?
Yes, if your oven has a rotisserie function.
How do I know it’s done?
Use a thermometer. Guessing leads to dry chicken.
Final Thoughts
Rotisserie chicken is one of the most practical skills you can learn in the kitchen. When done correctly, it delivers flavor, versatility, and value in one dish. This recipe gives you a dependable framework—not a shortcut—so every chicken comes off the spit juicy, golden, and worth repeating.
Rotisserie Chicken
Ingredients
Equipment
Method
- Remove the chicken from the refrigerator 30 minutes before cooking. Pat completely dry, including the cavity.
- Rub the chicken all over with olive oil or melted butter. Season generously with salt, pepper, paprika, garlic powder, and onion powder. Season the cavity as well.
- Tie the legs together with kitchen twine and tuck wing tips behind the body to keep the chicken balanced.
- Insert the rotisserie rod through the center of the chicken and secure tightly so it does not wobble.
- Preheat the rotisserie to about 375°F (190°C). Cook for 60–90 minutes, depending on size, until the internal temperature reaches 165°F in the breast and 175°F in the thigh.
- Remove the chicken and let it rest for 10–15 minutes before carving.
- Carve into portions and serve hot, or cool for storage.
Video
Notes
- Dry skin is essential for crisp results—do not skip patting dry.
- Trussing ensures even cooking and better browning.
- Save the carcass to make homemade stock.